
In the second task of the week, we had to explain the functions of a DSLR camera. For this task I’m using a Canon EOS 50D.

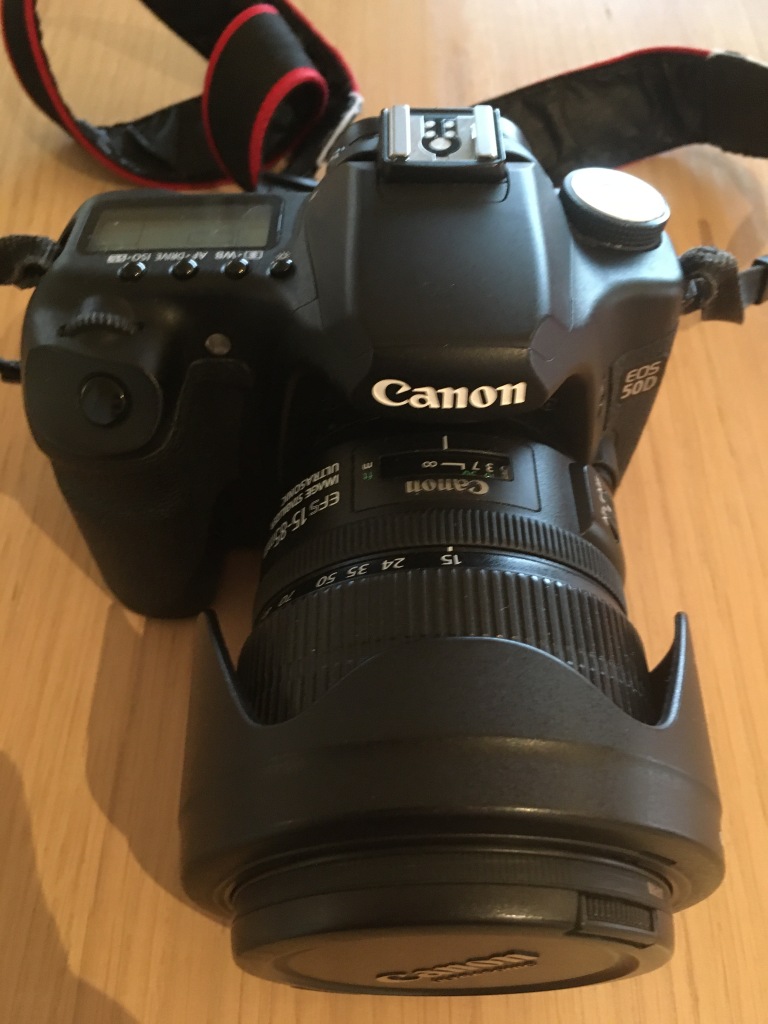
THE FRONT OF THE CAMERA
The shutter button — the one you use to take a picture — is located at the top right on the front of the camera. Right behind it, there is a wheel where you can quickly adjust exposure settings. On the lower left side of the front, beside the lens, there is a “depth of field preview button” which allows you to see a preview the depth of field of your framing while looking through the viewfinder or at the LCD screen. In the middle, there is a larger button for releasing the lens, and above it, there is a button for activating the built in flash.
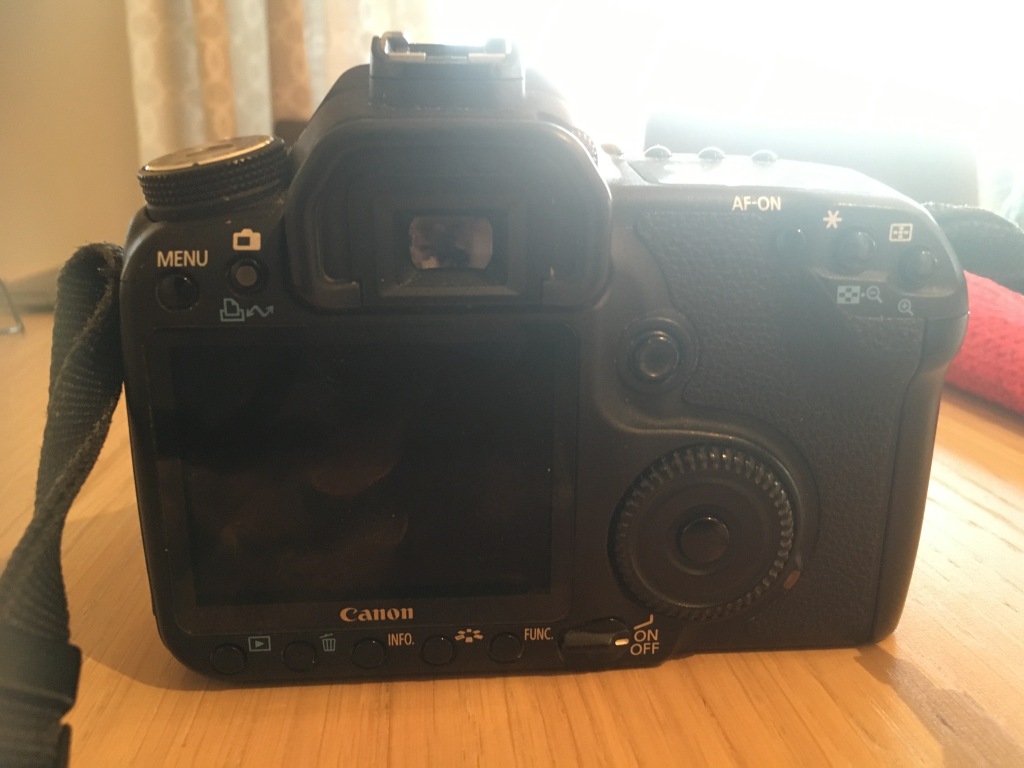
THE BACK OF THE CAMERA
On the back of the camera you’ll find the power switch, located in the middle bottom, which says “ON/OFF”.
On the upper left, next to the viewfinder, is the menu button, which is where you’ll find all the options for the camera and image settings. To the right of the menu button there is a button to switch the preview between the viewfinder and the color LCD screen. Then, to the right of the LCD screen, there is a small button/joystick for navigating through the menu and settings. Optionally, you can use the wheel below it to do the same thing.
On the top right, there is a focus point button, where you can change the focus point. Next to it, to the left, there is a button for locking the current exposure settings until you take a picture. These two button are also used for zooming when previewing images. Next to these, there’s a third button that says AF-ON, which stands for Autofocus On.
On the lower left, below the LCD screen, we have (from left to right) the preview image button, to quickly look at images taken. Next, there is the delete button followed by an “info” button, which, when pressed, shows information depending on what is on the LCD screen. Next, there is a button for setting a picture style preset. The last button is called “Func.”, which can be used to set different functions.
On the left side of the top, the “mode” wheel is located. This is where you quickly set camera settings, choosing between different automatic and manual image modes.
On the right side of the top of the camera there is an additional LCD screen where basic camera settings are shown. It also has a light button to brighten up the screen, illustrated by a light bulb. Next to it, there is a button called WB, which stands for White balance. This makes you able to adjust the color temperature. Then there is a button called AF Drive, which you can use to toggle through different Auto Focus modes. The last button is called ISO, and is used to adjust the ISO value.
ISO
ISO refers to the sensitivity of the camera’s sensor. Adjusting the ISO is one of three ways to control exposure on the camera — the other two being shutter speed and aperture. Adding more ISO will increase the camera’s ability to capture images in low light, and is mostly used when there isn’t more to gain from the other two. The reason that adding ISO is the last option is that it also creates grain or noise on the image — the higher the ISO number, the more noise will be produced on the picture, and it should therefore be kept as low as possible.
The Canon 50D has an ISO range of 100 to 3200.


APERTURE
Aperture refers to the opening in the lens, and defines how much light will pass through to the camera. This is measured in F-stops or F-numbers. The aperture can be adjusted to allow less or more light to enter the camera’s sensor; with a larger opening (which gives a lower F-number), more light enters the camera, and the image will become brighter. The same goes for the opposite direction; If you chose a higher F-number, the aperture opening will be smaller, less light will pass through, and the image will be darker. Each increment (called F-stops) halves or doubles the amount of light that will enter the camera.
In addition to being a way to control the exposure of the image, the aperture settings also affects the depth of field on the image; how much of the image is sharp or in focus. Moving the aperture from larger (lower F-number) to smaller (higher F-number) creates a deeper area of focus, and vice versa. With a large opening, the focus area becomes “shallow” or “thin”, which creates a lot of foreground and background blur to the image. A small opening makes more of the image appear sharp.


SHUTTER SPEED
The shutter speed defines the amount of time the shutter on the camera stays open. The faster the shutter speed, the shorter the exposure of light, which means that with a fast shutter speed, the image will be darker than with a slow shutter speed.
When taking an photo of something in movement, a faster shutter speed is required to create a sharp image.
The shutter speed on the Canon 50D ranges from 1/8000 of a second to 30 seconds. It can also be set to “Bulb” which means that the shutter will remain open as long as the shutter button is held down.


